Turning a creative concept into a tangible, high-quality custom metal badge might seem complex, but the process is straightforward when broken down. Whether you are creating fan merchandise, corporate promotional items, or commemorative event pins, every custom pin undergoes a precise 6-step manufacturing workflow.
Here is your complete guide to how custom lapel pins are made from idea to finished product.
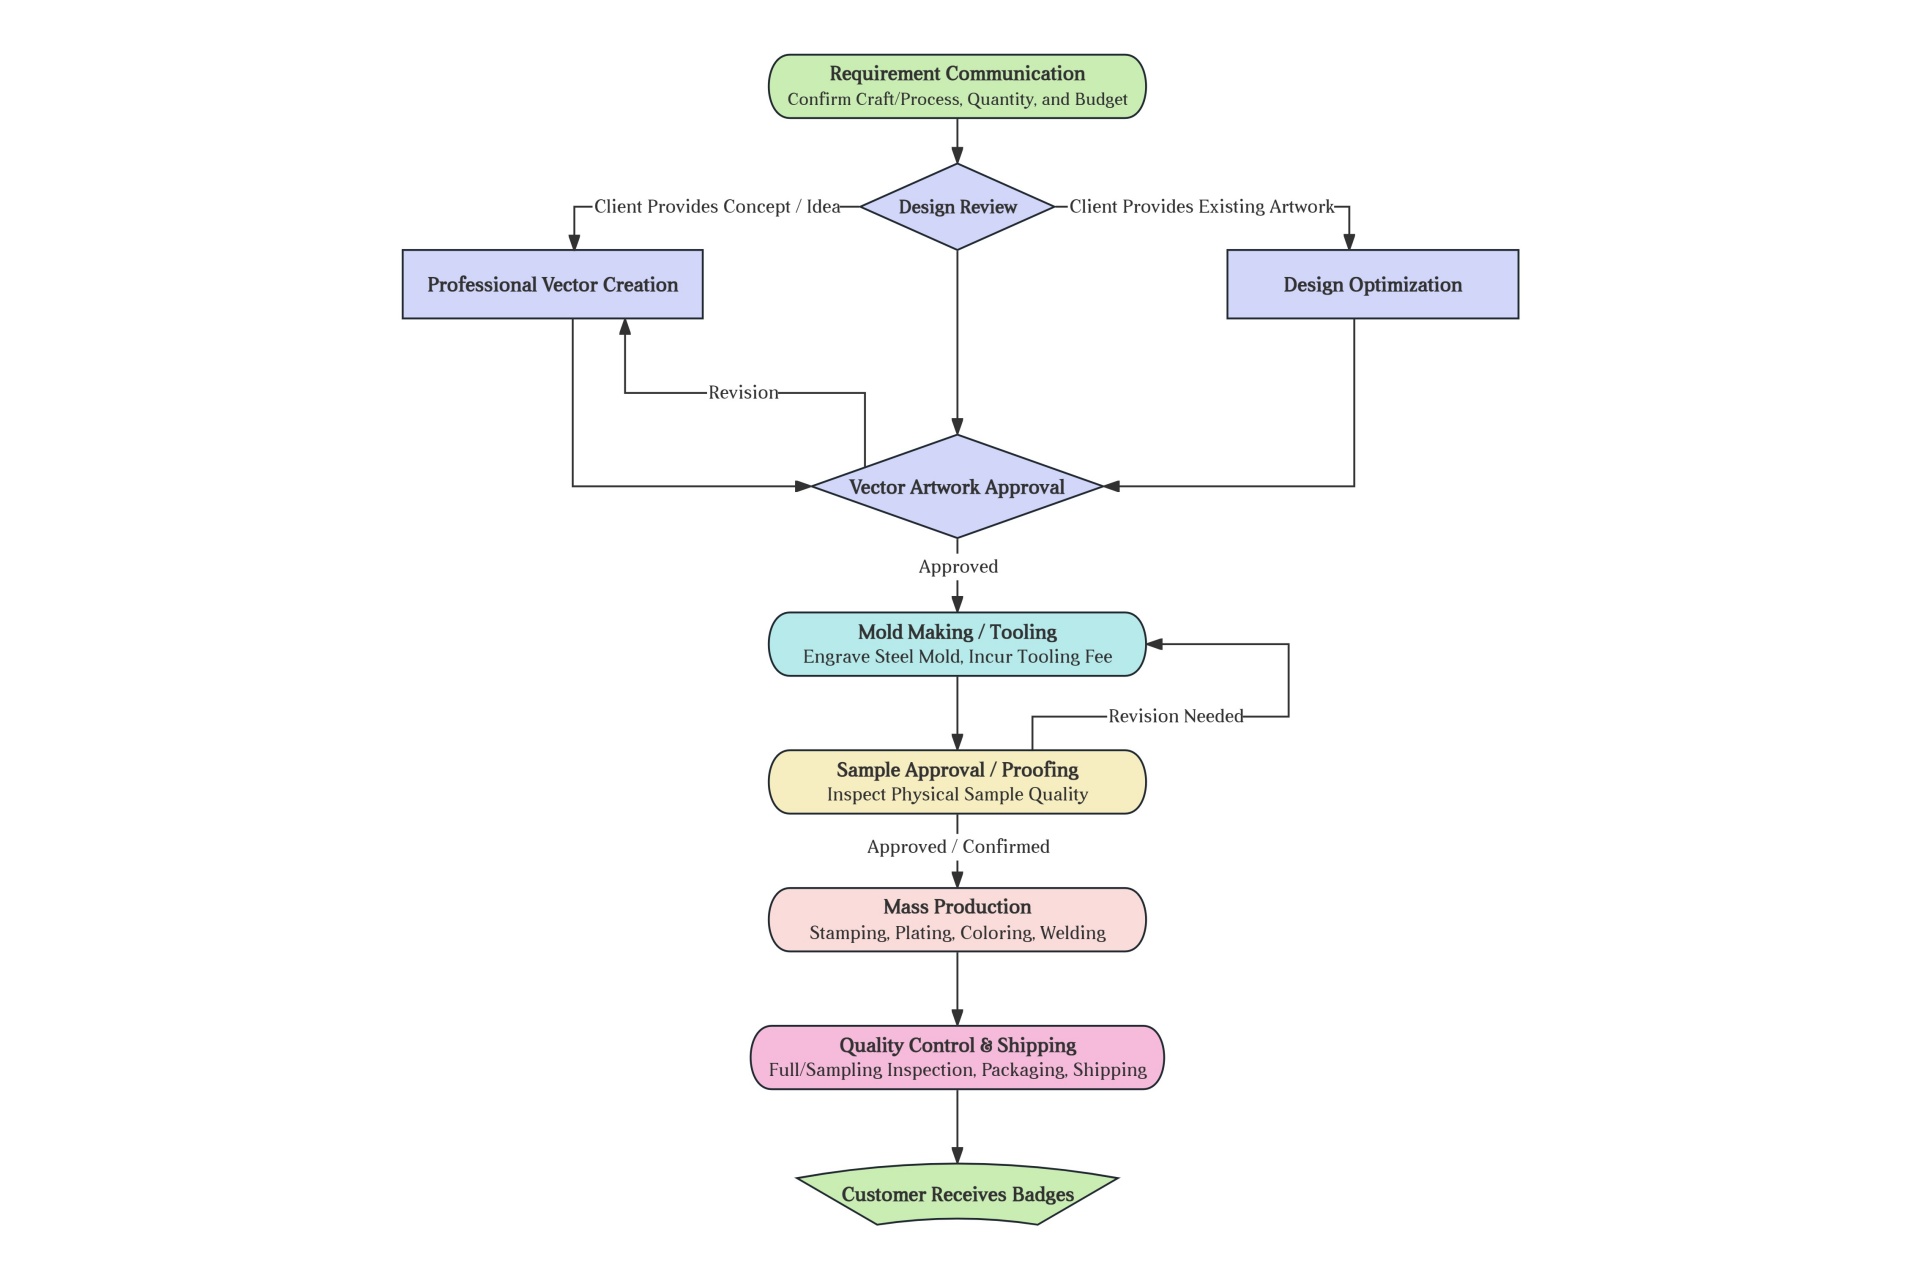
custom-pin-badge-order-workflow
Step 1: Requirements & Project Scope
Every successful custom pin project begins with clear communication. Before production starts, you will work with your manufacturer to finalize key project parameters:
● Purpose & Budget: Are these for corporate branding, retail sales, or trade show giveaways?
● Pin Style & Process: Choose between hard enamel pins, soft enamel, die-struck metal, or UV printed pins.
● Size, Shape & Material: Decide on dimensions, custom die-cut shapes, and base metals (zinc alloy, iron, or brass).
● Quantity & Timeline: Determine your order volume and event deadline.
Key Deliverable: A clear order spec sheet and cost estimate.
Step 2: Design & AI Vector Artwork
Visualizing your design is a crucial milestone, divided into two key phases:
①Submitting Your Concept: You can provide sketches, reference images, logos, or detailed text descriptions.
②Creating Vector Artwork: Your manufacturer or designer converts your idea into an AI or CDR vector file using professional software like Adobe Illustrator.
Why Vector Artwork Matters:
Unlike standard raster images (JPEGs/PNGs), vector files use mathematical paths rather than pixels. They can be scaled infinitely without losing quality, defining every line, metal border, and Pantone color zone needed to carve the steel mold.
Key Deliverable: An approved vector artwork proof signed off by both parties.
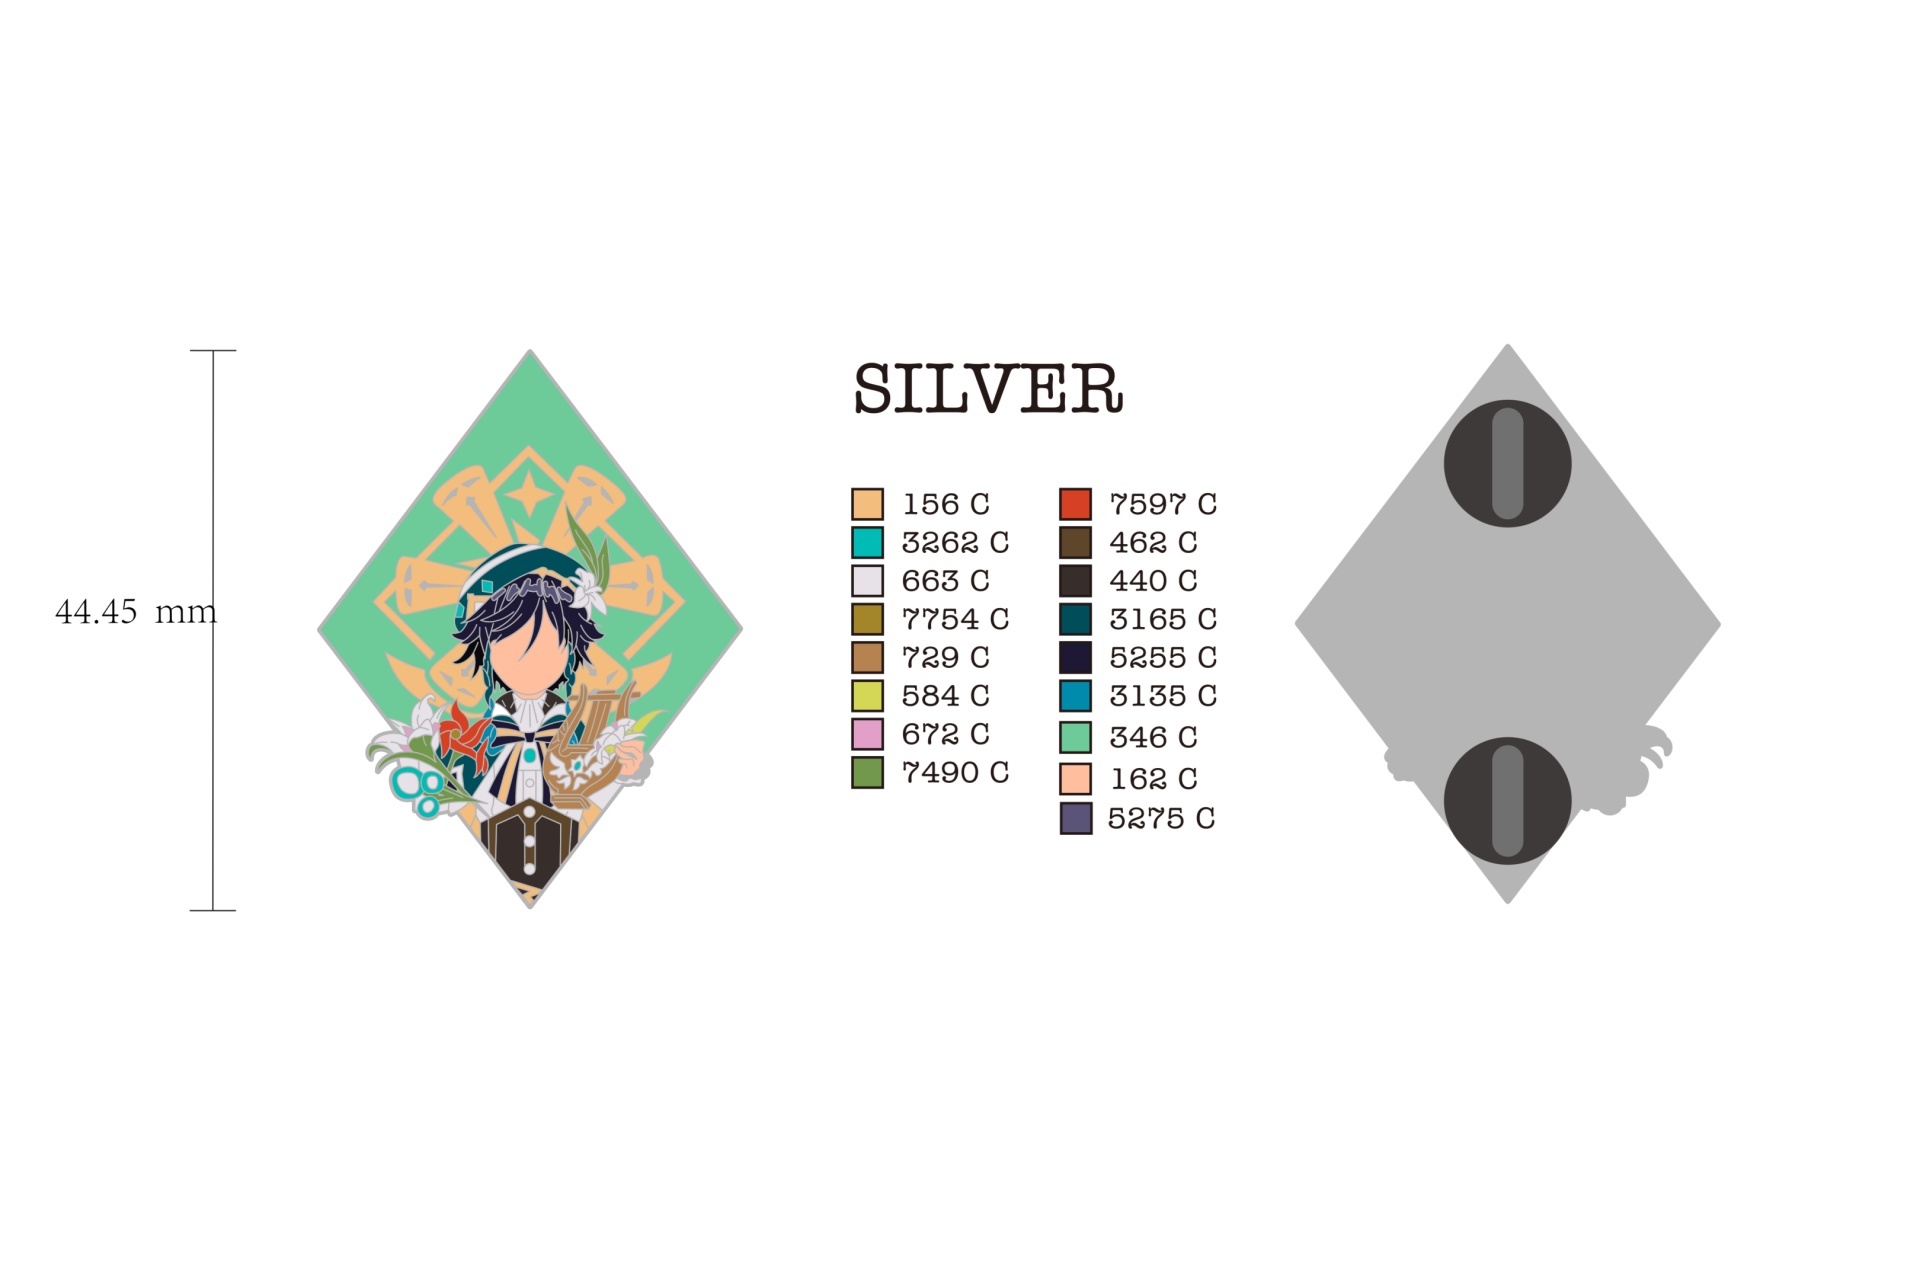
genshin-venti-rhombus-pins-design
Step 3: Steel Mold Tooling
Once vector artwork is locked in, precision CNC engraving machines carve your custom design into a steel block, creating a die mold.
● Tooling Fee: This step involves a one-time mold fee. Most manufacturers waive or refund this fee for large bulk orders or future re-orders.
● Mold Uniqueness: Every custom design requires a dedicated, custom-carved steel mold.
Key Deliverable: A hardened steel mold featuring your pin design in inverse relief.
Step 4: Sample Approval & Physical Proofing
Before launching full-scale manufacturing, a physical pre-production sample (typically 3–5 pieces) is produced using your custom mold.
● Purpose: Inspect physical build quality, metal lines, plating, and color accuracy against the original proof.
● Importance: Pre-production sampling is your final opportunity to make adjustments before mass production begins.
● Sample Fee: Sampling fees are standard, though often credited toward the final balance of a bulk order.
Key Deliverable: Physical sample pins approved for mass production.
Step 5: Mass Production & Assembly
After sample sign-off, full-scale production begins through several specialized factory processes:
①Stamping / Die-Casting: High-pressure stamping or casting shapes the raw metal blanks using your custom mold.
②Electroplating: Base metals are plated in nickel, gold, rose gold, silver, or antique finishes.
③Color Filling:
● Hard Enamel: Recessed areas are filled with color paste, baked, and polished flat.
● Soft Enamel: Recessed areas are filled with liquid enamel paint and oven-cured, leaving raised metal edges.
④Polishing: Surfaces are smoothed to a reflective finish.
⑤Protective Coating: Transparent epoxy or clear seals are applied if needed for added durability.
⑥Attachment Soldering: Butterfly clutches, safety pins, or magnetic backings are soldered securely to the back.
Key Deliverable: Fully assembled, semi-finished custom pin inventory ready for final review.
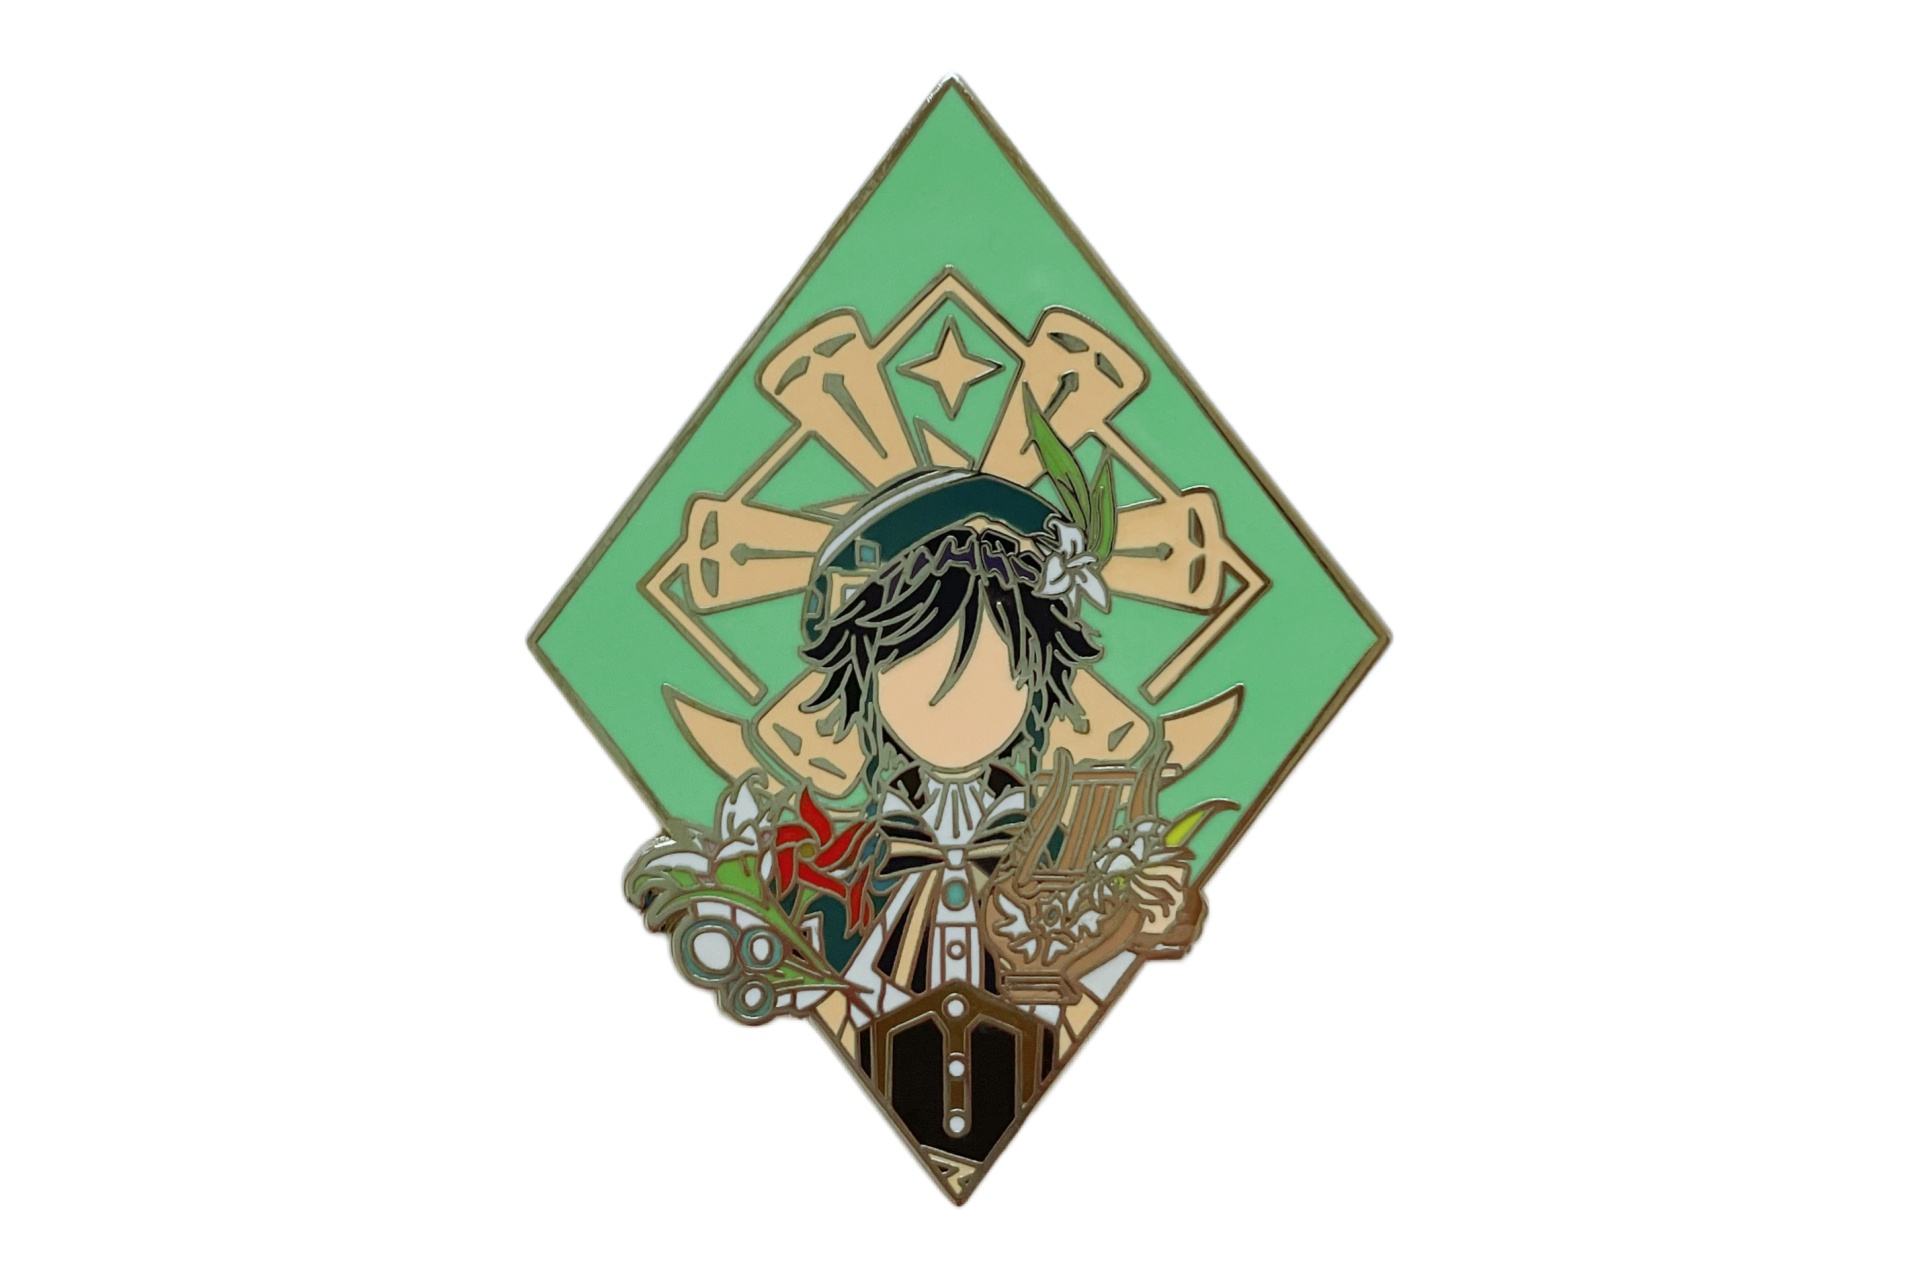
genshin-venti-rhombus-pins
Step 6: Quality Control, Packaging & Shipping
Every finished batch undergoes strict inspection—checking for plating flaws, enamel pinholes, or incorrect color fills.
Once approved, pins are individually packaged into OPP bags, custom backing cards, or velvet gift boxes before being packed and shipped to your door via express air courier.
Key Deliverable: Flawless custom lapel pins delivered directly to you.
The 6-Step Workflow Summary
Concept → Vector Artwork → Mold Tooling → Sample Approval → Mass Production → QC \& Shipping
Pro Tips for Ordering Custom Pins
● Budget Planning: Account for potential artwork adjustments, one-time mold fees, and sample shipping fees in your total budget.
● Lead Time Management: The standard manufacturing cycle ranges from 15 to 30 business days depending on design complexity and order volume. Always order early for fixed-date events.
● Partnering with the Right Supplier: A reliable custom manufacturer will guide you through plating options, color matching, and design feasibility at every stage.
Ready to Bring Your Pin Design to Life?
Contact our production team today with your rough sketch or vector artwork to receive a free quote and digital proof!